
Git Installation & Setup
Before using Git, we need to install and configure it on our computer. After installation, Git commands can be used from the terminal or command prompt.
Configuration is also important because Git saves the developer’s username and email address with each commit. This helps identify who made the changes to the code.
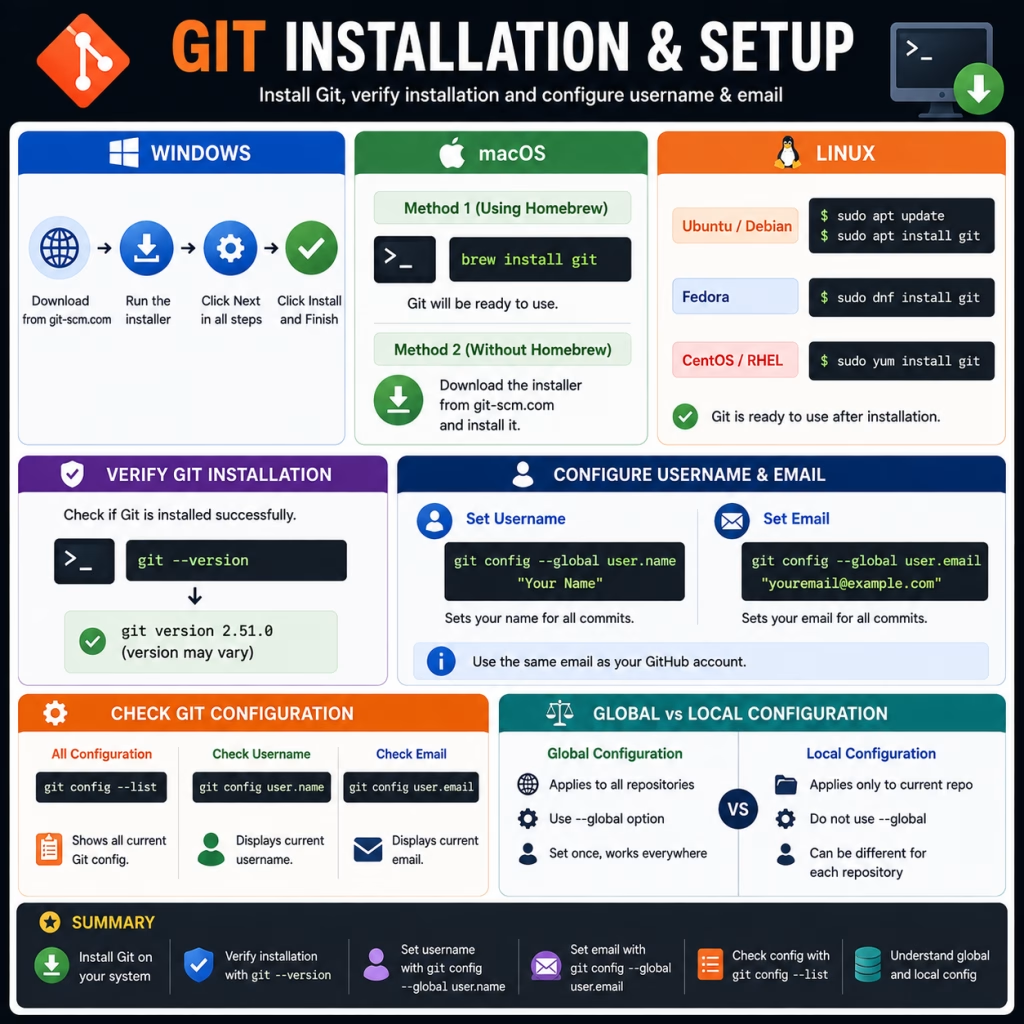
Install Git on Windows
Installing Git on Windows is very simple.
Step 1: Visit the official Git website and download the latest version.
Step 2: Open the installer after the download is complete.
Step 3: Continue clicking the Next button throughout the installation wizard.
Step 4: Click the Install button.
Step 5: Once the installation is complete, click the Finish button. Git is now installed on your system.
Install Git on macOS
There are several methods to install Git on macOS.
Method 1: If Homebrew is installed, open Terminal and run the following command:
brew install gitGit will be ready once the installation is complete.
Method 2: If you don’t want to use Homebrew, you can download the installer from Git’s official website and install it.
Install Git on Linux
The installation commands vary slightly across different Linux distributions.
Ubuntu / Debian
sudo apt update
sudo apt install git
Fedora
sudo dnf install gitCentOS / RHEL
sudo yum install gitOnce the installation is complete, Git is ready to use.
Verify Git Installation
To verify whether the installation was successful, run the following command in the terminal or command prompt.
Command
git --versionOutput
git version 2.51.0The version number may be different.
If the version is displayed, Git has been successfully installed.
Configure Username and Email
Open git terminal after installation or simply you can use commands in any terminal or command prompt.
Git saves the developer’s name and email address with every commit.
Therefore, the username and email address should be configured first after installation.
Configure Username
git config --global user.name "Vishal Kumar"- git → Executes a Git command.
- config → Sets or changes the Git configuration.
- –global → Configuration will apply to all repositories.
- user.name → Sets the Git username.
- “Vishal kumar” → Your name that will appear in commits.
Configure Email
git config --global user.email "vishal@gmail.com"- git → Executes a Git command.
- config → Changes the configuration.
- –global → Applies to all repositories.
- user.email → Sets the email address.
- “ritik@example.com” → Your Git email.
If you use GitHub, it’s generally best to use the email address registered with your GitHub account.
Check Git Configuration
Use the following command to check if the configuration is saved.
git config --listOutput
user.name=Ritik Kumar
user.email=ritik@example.com
core.editor=vim
init.defaultBranch=main
This command displays Git’s current configuration in a list.
Check Only Username
git config user.nameOutput
Vishal kumarCheck Only Email
git config user.emailOutput
vishal@gmail.comDifference Between Global and Local Configuration
Configuration in Git can be set at two levels.
| Global Configuration | Local Configuration |
| Applies to all repositories. | Applies only to the current repository. |
| The –global option is used. | –global is not used. |
| Usually set only once. | A different username can be set for each repository. |
Example
Global Username
git config --global user.name "Vishal Kumar"Local Username
git config user.name "Anshu Gaur"In this case, the Anshu Gaur username will be used in the current repository, while Vishal Kumar will remain in the remaining repositories.
Summary
- After installing Git, the installation should be verified first.
- git –version is used to verify the installation.
- git config –global user.name sets the username.
- git config –global user.email sets the email address.
- git config –list displays the current Git configuration.
- Global configuration applies to all repositories, while local configuration applies only to the current repository.